Vacation was great! While I organize myself for the rest of the summer, here are some pictures of a bumbleberry pie I made while visiting my parents, pictures courtesy of my sister's phone. :)
Tuesday, July 17, 2012
Wednesday, June 27, 2012
Mini-Piggy Bank
It seems like I never have any spare change when I need it,
and I have nothing but when I don’t! I’ve found this to be particularly true
when I’m at work. It seems like once or twice a month, there’s some need for
spare change: a penny drive or space change collection or similar. Well, my
purse is not usually convenient, my slacks don’t have pockets, and while I
often have change in my desk, who knows where it is under the broken pencils
and half-used sticky pads.

First, I wanted to cut a change hole in the top. The jar is so old, I think it originally sold for a dollar seventy. This means the lid is a pretty heavy metal. I looked online for how to safely cut it and couldn't find much. I did read that a chisel would work, but we didn't have one. I also didn't have a block of wood to pound a nail through the lid into ten times to create a slit, and frankly I'm not sure how well that would have worked, anyway.
My husband ended up using his Dremel to cut me a hole. I was going to do it myself, but I chickened out at the last minute because I was afraid I either wouldn't grip the lid tight enough and send it flying, or I wouldn't press with the blade hard enough and bounce it off and catch myself in the hand. Anyway, the Dremel worked great, but there were sparks involved, so I recommend wearing safety goggles and not letting children do this part of the project.
I suppose you don't really need the hole in the top, but I think it makes it less likely to get into to take the money if you're using the jar as a way to save up for something special.
On to decorating! Next, I cut up some scrapbook paper leftovers into even smaller pieces. I started with about 1" squares and found that 1/2" squares were better because of the small size of the jar and getting around the rounded curve at the top. My squares weren't perfect, either, because I thought that made a more interesting pattern on the jar.
Then I got out my trusty Mod Podge. I only have Shimmer Mod Podge, which means it made my paper darker, with a silver glittery tint. It was really dark when first applied, but dried nicely. Follow the instructions to paint a small section of the jar with Mod Podge, put down a piece of paper, spread more Mod Podge over that, and repeat with all the pieces of paper until the jar is covered.
To break things up a little, I used plain white paper for the lid. See how silver it is now?
After all of that was thoroughly dry, I used a spray sealant over it all. Some people will say this is optional, but I've had trouble with my Mod Podge getting kind of sticky in high humidity, even months after it was painted.
It wasn't intentional, but I think it's kind of nice how the outside of the jar resembles money now, which is what it will hold. I really just went through my paper box and pulled out the first strips of paper I found, about 12" x 1", which I never got around to throwing away in the hopes I could still use it. Seems like I could!
I read some online tutorials that suggested using empty plastic jars (such as peanut butter jars) for kids because the lids are easier to cut through and they can't break. I'm not sure how well Mod Podge sticks to plastic, but you could decorate some other way. Other people have suggested using Mason or canning jars, then instead of the regular metal lit, cutting a round piece of cardboard with a slit in it and then using the regular jar ring to secure it. I've also seen the small cardboard oatmeal containers used, and I think that would be really fun to decorate, and easier than a jar because it doesn't have the rounded edge at the top, which I found annoying to get around.
Have you ever tried to make your own piggy bank? If so, what did you use as a container? How did you choose to decorate it?
I decided to something about it. I’ve had this little Grey
Poupon jar that I’ve been itching to used more effectively. It usually houses thumb tacks, but it’s
sort of a waste of space since I don’t have that many thumb tacks. It was
perfect to make a mini bank out of so I’d always be able to find change
quickly.

First, I wanted to cut a change hole in the top. The jar is so old, I think it originally sold for a dollar seventy. This means the lid is a pretty heavy metal. I looked online for how to safely cut it and couldn't find much. I did read that a chisel would work, but we didn't have one. I also didn't have a block of wood to pound a nail through the lid into ten times to create a slit, and frankly I'm not sure how well that would have worked, anyway.
My husband ended up using his Dremel to cut me a hole. I was going to do it myself, but I chickened out at the last minute because I was afraid I either wouldn't grip the lid tight enough and send it flying, or I wouldn't press with the blade hard enough and bounce it off and catch myself in the hand. Anyway, the Dremel worked great, but there were sparks involved, so I recommend wearing safety goggles and not letting children do this part of the project.
I suppose you don't really need the hole in the top, but I think it makes it less likely to get into to take the money if you're using the jar as a way to save up for something special.
On to decorating! Next, I cut up some scrapbook paper leftovers into even smaller pieces. I started with about 1" squares and found that 1/2" squares were better because of the small size of the jar and getting around the rounded curve at the top. My squares weren't perfect, either, because I thought that made a more interesting pattern on the jar.
Then I got out my trusty Mod Podge. I only have Shimmer Mod Podge, which means it made my paper darker, with a silver glittery tint. It was really dark when first applied, but dried nicely. Follow the instructions to paint a small section of the jar with Mod Podge, put down a piece of paper, spread more Mod Podge over that, and repeat with all the pieces of paper until the jar is covered.
To break things up a little, I used plain white paper for the lid. See how silver it is now?
After all of that was thoroughly dry, I used a spray sealant over it all. Some people will say this is optional, but I've had trouble with my Mod Podge getting kind of sticky in high humidity, even months after it was painted.
It wasn't intentional, but I think it's kind of nice how the outside of the jar resembles money now, which is what it will hold. I really just went through my paper box and pulled out the first strips of paper I found, about 12" x 1", which I never got around to throwing away in the hopes I could still use it. Seems like I could!
Alternative Containers and Lids!
I read some online tutorials that suggested using empty plastic jars (such as peanut butter jars) for kids because the lids are easier to cut through and they can't break. I'm not sure how well Mod Podge sticks to plastic, but you could decorate some other way. Other people have suggested using Mason or canning jars, then instead of the regular metal lit, cutting a round piece of cardboard with a slit in it and then using the regular jar ring to secure it. I've also seen the small cardboard oatmeal containers used, and I think that would be really fun to decorate, and easier than a jar because it doesn't have the rounded edge at the top, which I found annoying to get around.
Have you ever tried to make your own piggy bank? If so, what did you use as a container? How did you choose to decorate it?
Wednesday, June 20, 2012
Just Relax!
A while back, I blogged about my adoration with making lists. Well, a few days ago I suddenly realized just how compulsive it really is. We're planning a vacation to visit family on the West Coast, and we've decided to lay off the organization. Normally, we visit at Christmas and because there are so many holiday things to do and people to coordinate, meals and where we're going when tends to be more structured. Not this time. I promised my husband a relaxing vacation where we can anything or nothing or a little bit of both.
Well, I've started thinking about things I want to do (read: places I want to eat) that I don't have the opportunity to do here. Suddenly, I began to wonder whether my brother would want to come, and what his work schedule is and how to work around that, and then there is my sister and her family, and taking into consideration how many days we'll be there...
I cannot tell you how hard it was to not get up and grab some paper to make up a day-by-day calendar (subcategorized by morning/afternoon and meals) to sort out when we could do what and see whom. Fortunately, I resisted. I called my mom and asked her to make a list of everything I wanted to do and places I wanted to eat, and when we come, we can just look at the list each morning and decide if we want to do anything on it or not.
I think that's a fair compromise, right?
Monday, June 18, 2012
Birdhouse Cake
A good friend in my department at work recently retired, and I made the
cake for the party. Just thought I'd share how it turned out! Yes, it's a birdhouse! I cut off the corners to make the peaked roof, but after trying to put frosting on a newly sawed off cake edge, I don't think I'll be trying it again anytime soon! That bit of chocolate you see in the middle is a hole I cut out of the top cake layer (it's a two layer cake) and is supposed to represent the entrance. I was going to also add the silhouette of a bird and maybe some chocolate "branches" made out of hardened chocolate, but I ran out of time.
Friday, June 15, 2012
Big Sky Artworks
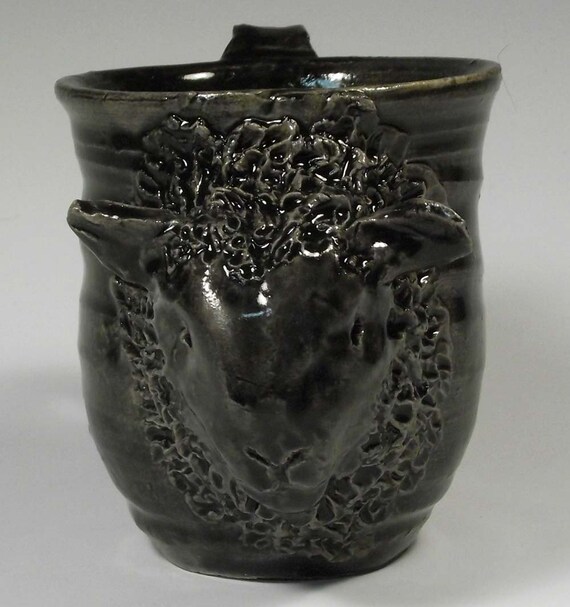 |
| Who's a Black Sheep? |
I'm particularly enthralled with her animal mugs. I've never seen anything like these anywhere else. She throws all the pottery personally and then sculpts the faces, but don't think that you won't find anything if you don't want to drink from a sheep. Kate also has traditional mugs, sculptures, and more.
 |
| Funny Bunny Rabbit |
Isn't this a cute bunny? It reminds me of being a little kid and drinking hot cocoa out of mugs with two handles for maximum safety. :) I can just imagine it being the go-to mug in the morning.
Better yet, take him to work to show off to your co-workers how much cooler you are (and to stop that darn John Doe from two floors up from using your personal mug. Drinking from a big bunny head is not considered stealthy).
 |
| Dragon's Head |
Just as an FYI, this mug holds a full pint of whatever beverage you think is appropriate to be drinking out of a dragon's head. You know, things like a mild caffeine-free herbal tea or some such thing. ;)
 |
| Lucky Duck! |
This little guy isn't so lucky, after all - he used to have feet! But his accident is to your benefit, because it means he's considered a "second": the same cute face and functionality at a lower price. I love the eyes looking a little bit off to the side and the expression on his beak.
I also kind of think these mugs are the sort of thing people really, really want, but have a hard time buying for themselves. Do them a favor. Make it a gift. :)
*Note* I am not compensated for any of my Friday Features. I am currently approaching shops I particularly like and offering to share them so that my readers may discover new shops.
Wednesday, June 13, 2012
Super Easy Hair Clip Organizer
Is a two item project simple enough? ;)
As you've read, I've been really interested in hair clips recently. I don't wear them to work, but I do wear them every weekend and any other time off I have (have I mentioned I'm also growing my hair out?). Well, I ended up with hair clips on my nightstand, on the kitchen table, end table, coffee table, and bathroom counter. Really? How did that happen?
Anyway, I needed a quick and easy way to store them in one place, but not in a box, because then I'd forget about them. It had to be somewhere obvious, but couldn't take up a lot of space, because let's face it: space is sort of at a premium at my house.
After some thought, I came up with an easy solution. All I needed was some grosgrain ribbon (found in a drawer leftover from another project) and a suction cup (found at Ace Hardware for about $0.53). I decided on the larger suction cup, which was 3cm in diameter (a little over 1").
I cut about 2' of ribbon, tied it with a nice little bow to the suction cup, and put it on my bathroom mirror. If you're worried about humidity, a dresser bureau mirror would work, too, but since I don't do my hair in the bedroom, I opted for the bathroom.
How was that? What do you use to keep your hair accessories organized?
Monday, June 11, 2012
Stemless Magnetic Wine Charms
 I'd like to introduce you to another new item in my Etsy shop which I hope people will enjoy. I've been thinking of ways to expand my Wine Charm line, and I decided that one of the best ways to do that would be to branch out in the kind of wine charms I make. Two weeks ago, you saw my first magnetic clasp wine charms.
Today, I'd like to introduce you to my magnetic wine charms for stemless glasses, although you certainly don't need a stemless glass to use them!
I made them in a set of 6 (chose your colors) and a set of 13 (you get one of each color). To play it safe, I found some simple colored tiles to launch this line. If it becomes popular, I'd like to create my own tiles with a more personal touch. I'm already experimenting with different types!
 |
| No, I didn't forget to rotate the picture! I'm holding it on its side to show how strong the magnet is. |
 |
| You guessed it: this one is really upside down! |
 |
| An example of twelve different colors offered. The thirteenth color is the one at the top of the page. |
What do you think? Is this something you'd consider buying for yourself or a loved one?
Saturday, June 9, 2012
Etsy Team
Those of you who shop and sell on Etsy probably know that there are Teams you can join. Well, I've just created a new team! I was looking for a place where I could post simple opinion questions, such as color preferences, etc, and couldn't find anything.
"Just My Opinion" was born! This team is for anyone to join. Feel free to ask questions or answer questions or a little bit of both. Maybe you just want to "lurk" for a bit and see what other people have to say. ;)
Since the team is brand-new, there is no one but me so far. Won't you be the first to officially join?
Friday, June 8, 2012
One Lovely Blog Award
I know I normally have a Friday Feature, but this week I wanted to share something a little different. Yesterday I was nominated for the One Lovely Blog Award! It came as a complete surprise, but I am happy to accept. Here are the rules of acceptance that were given to me:
I was nominated by Dana of Cereus Art: Casual Costal Decor. Thank you, Dana! You have a lovely blog and website!
Okay, here are 5 things you may not know about me, in no particular order:
- Link back to the blogger who nominated you
- Paste the award image on your blog
- Tell 7 facts about yourself
- Nominate 15 other blogs that you would like to give the award to
- Contact the bloggers that you have chosen to let them know about the award
I was nominated by Dana of Cereus Art: Casual Costal Decor. Thank you, Dana! You have a lovely blog and website!
Okay, here are 5 things you may not know about me, in no particular order:
- I grew up Washington State
- Potatoes are probably my favorite food
- I lived in Alabama for over 2 years
- My hair has been in a state of growing out and being cut off for probably the last 15 years
- In addition to crafting, I teach HS English (which is why my blog is a teensy bit neglected in the winter - I'm too busy grading essays and research papers to write much!)
And now, 5 blogs that I enjoy reading:
Please check them out - you won't regret it!
Thursday, June 7, 2012
New Survey
Check out the quick one question survey on my Facebook page! It's just asking which option you'd prefer for receiving wine charms in the mail.
There's also an older one question survey a little ways down the page regarding which kind of wine charms you're most interested in - please take that one as well if you'd like!
There's also an older one question survey a little ways down the page regarding which kind of wine charms you're most interested in - please take that one as well if you'd like!
Wednesday, June 6, 2012
Create an Easy Custom Formula in Excel to Price Items
I wrote a while back about taking inventory of several of my supplies. Today, as I waited not-so-patiently for new supplies to come in, I decided to take the time to update and review my pricing and profit margins. Once upon a time, I had imputed information into Excel to easily see my costs. For example, I had done the math to find out how much 20 beads cost, the number that fit around one ring for my wine charms.
Well, since then I have added new types of embellishments and had to change old ones (switching suppliers or brands and the like). It was time to make sure I was still on the straight and narrow.
Unfortunately, I found that my old spreadsheet was a mess. Sure, it had information in it, but it didn't calculate anything by itself, and really, isn't that why we use Excel? So it will calculate things for us?
After some time searching online and experimenting, I finally figured out how to create a mini-spreadsheet with a built in formula to quickly redo the math anytime my costs change. Turns out it's ridiculously easy. I'm using an Excel 2004 Mac version, but I'm pretty sure Excel doesn't change much.
The first thing I did was type out the information I wanted to know (materials cost/profit with various fees, etc.) onto the left side of a set of boxes I set off with dark lines. The lines aren't necessary. It looks like this -------------------------->
Then it was time to create the formula. Most of my items are $9, $12, or $15, so I created a Master Formula for each to copy/paste easily later. This is my example for the $15 item.
I wanted to make it easier to see and modify the formula I was creating, and since the formula bar wasn't at the top of my page, I had to make it visible. To do that, I went into View at the top of the page and checked it off. Looks like this -------------------------->
Without the formula bar, you can't change things later, like adding or deleting how may items you want added together for the Materials Cost.
Once the formula bar was turned on, this popped up at the
tip of my page ------------------------------->
 "What's the formula in the bar?" you ask. That's a good question. Look up at the first picture. See where it says "Material Cost" and next to it 7.1? Well, I clicked into where it says 7.1 when it was an empty box. I then went up to the formula bar and typed in my formula (I could have typed straight in the box, too, and it would have disappeared to insert the answer).
FORMULA:
That's all there is to it! I know it looks like of cumbersome, but it was truly surprisingly easy once I figured out all the information I wanted.
To modify, I copied and pasted it to the second page of the spreadsheet, then deleted the words Materials 1, and typed "4mm Beads x20", and then typed the cost of those 20 beads into the adjoining box. Copying it has no effect on the formula. Even though I originally said G23 for Material 1, when I paste it, the formula will automatically change to J5 or wherever the Material 1 box now is.
I also modified one of my formulas to include a x6 factor since many of my items are sold in sets of six. In the same way that I subtracted the materials cost from the selling price, after I calculated the costs of a single wine charm, I added a formula at the end to multiple everything by six so I could easily see the price of one versus the price of the set.
The reason I went to all this trouble is twofold: One - my costs change on a yearly basis, and Two - my costs to the bead/finding are often uneven cents, and I hate adding up a list of cents by hand, over and over and over, and then redoing it all because I can't find/forgot what it was the first time. In the future, when those 20 beads go from $0.50 to $0.70, all I need to do is change it on the spreadsheet and I have the new calculation for my costs and profit. This also allows me to quickly calculate the price of new items - for example, if I didn't know what I wanted to sell something for, seeing the raw cost (and time) quickly could help me decide the overall worth.
To make things even easier in the future, on a third page of the spreadsheet, I began compiling how I got my costs (I currently have all that information written on notes in several locations). For example, I typed the item name, how many individual parts it had, and the total cost (I included a cut of shipping costs where applicable). For example, one material might say: Brand X 4mm beads: 250 (36in) @Y price = Price of individual bead. Yes, it's nitty-gritty to get down to the cost of one bead, but I have to start treating myself like a real business, and that one bead times 20 for one charm times 6 for a set means I more accurately know how much I'm spending per item and whether my prices are fair. It also means if I want to switch to Brand Z 4mm beads, which may be 400 to a bag, I can see immediately if the cost is equal or better.
Well, since then I have added new types of embellishments and had to change old ones (switching suppliers or brands and the like). It was time to make sure I was still on the straight and narrow.
Unfortunately, I found that my old spreadsheet was a mess. Sure, it had information in it, but it didn't calculate anything by itself, and really, isn't that why we use Excel? So it will calculate things for us?
After some time searching online and experimenting, I finally figured out how to create a mini-spreadsheet with a built in formula to quickly redo the math anytime my costs change. Turns out it's ridiculously easy. I'm using an Excel 2004 Mac version, but I'm pretty sure Excel doesn't change much.
 |
| (These number are made up for the sake of example) |
Then it was time to create the formula. Most of my items are $9, $12, or $15, so I created a Master Formula for each to copy/paste easily later. This is my example for the $15 item.
I wanted to make it easier to see and modify the formula I was creating, and since the formula bar wasn't at the top of my page, I had to make it visible. To do that, I went into View at the top of the page and checked it off. Looks like this -------------------------->
Without the formula bar, you can't change things later, like adding or deleting how may items you want added together for the Materials Cost.
Once the formula bar was turned on, this popped up at the
tip of my page ------------------------------->
 "What's the formula in the bar?" you ask. That's a good question. Look up at the first picture. See where it says "Material Cost" and next to it 7.1? Well, I clicked into where it says 7.1 when it was an empty box. I then went up to the formula bar and typed in my formula (I could have typed straight in the box, too, and it would have disappeared to insert the answer).
FORMULA:
- Type an = sign. This tells the computer that it's going to put in an answer
- Type a ( without any spaces between it and the = sign. This tells the computer this is the start of the formula.
- In the example above, G equals the Column Letter (look at the top of your page. It could just as easily have been A, B, C, etc.) and 23 equals the row. The boxes that I'm putting the cost of my materials into are G23 through G28).
- Type in the Column/Rows that you want to add together with a + sign between each. In my example, I had six materials, so I wanted to add six Column/Rows together.
- Type a ) to show that this is the end of your formula.
That's all there is to it! I know it looks like of cumbersome, but it was truly surprisingly easy once I figured out all the information I wanted.
MAKE THE FORMULA FIT ANY ITEM:
To modify, I copied and pasted it to the second page of the spreadsheet, then deleted the words Materials 1, and typed "4mm Beads x20", and then typed the cost of those 20 beads into the adjoining box. Copying it has no effect on the formula. Even though I originally said G23 for Material 1, when I paste it, the formula will automatically change to J5 or wherever the Material 1 box now is.
I also modified one of my formulas to include a x6 factor since many of my items are sold in sets of six. In the same way that I subtracted the materials cost from the selling price, after I calculated the costs of a single wine charm, I added a formula at the end to multiple everything by six so I could easily see the price of one versus the price of the set.
* * *
The reason I went to all this trouble is twofold: One - my costs change on a yearly basis, and Two - my costs to the bead/finding are often uneven cents, and I hate adding up a list of cents by hand, over and over and over, and then redoing it all because I can't find/forgot what it was the first time. In the future, when those 20 beads go from $0.50 to $0.70, all I need to do is change it on the spreadsheet and I have the new calculation for my costs and profit. This also allows me to quickly calculate the price of new items - for example, if I didn't know what I wanted to sell something for, seeing the raw cost (and time) quickly could help me decide the overall worth.
To make things even easier in the future, on a third page of the spreadsheet, I began compiling how I got my costs (I currently have all that information written on notes in several locations). For example, I typed the item name, how many individual parts it had, and the total cost (I included a cut of shipping costs where applicable). For example, one material might say: Brand X 4mm beads: 250 (36in) @Y price = Price of individual bead. Yes, it's nitty-gritty to get down to the cost of one bead, but I have to start treating myself like a real business, and that one bead times 20 for one charm times 6 for a set means I more accurately know how much I'm spending per item and whether my prices are fair. It also means if I want to switch to Brand Z 4mm beads, which may be 400 to a bag, I can see immediately if the cost is equal or better.
Monday, June 4, 2012
BLT - My Way
Who doesn't love a BLT? (Disclaimer: there will be a picture of bacon in this post, so if you don't like bacon, you may leave now and return on Wednesday for my next new post with no hard feelings.) Okay, now that everyone who doesn't has left the room, I gotta say, I don't eat bacon all that often, but I absolutely love the way it makes my house smell when cooking it.
As the bacon was cooking, I suddenly realized we only had rye sandwich bread, which I don't particularly care for. Looking in the cupboard, I found Plan B: hoagie rolls! (Sorry, I don't consider hoagie rolls to be "real sandwich bread," i.e. the kind I'd put PB&J on to take in my lunch.)
It turns out that three strips of bacon fits perfectly on a hoagie roll. Toast the bread a bit first, light spread of butter on top, and my own special take (since I don't like mayo on sandwiches, I know, I know, we can discuss my food neuroses another time): a thin spread of Ranch Dressing on the top piece of bread!
And here it is is in all it's bacon, lettuce, tomato glory! Go ahead, say YUM!
Friday, June 1, 2012
Leather Blossoms
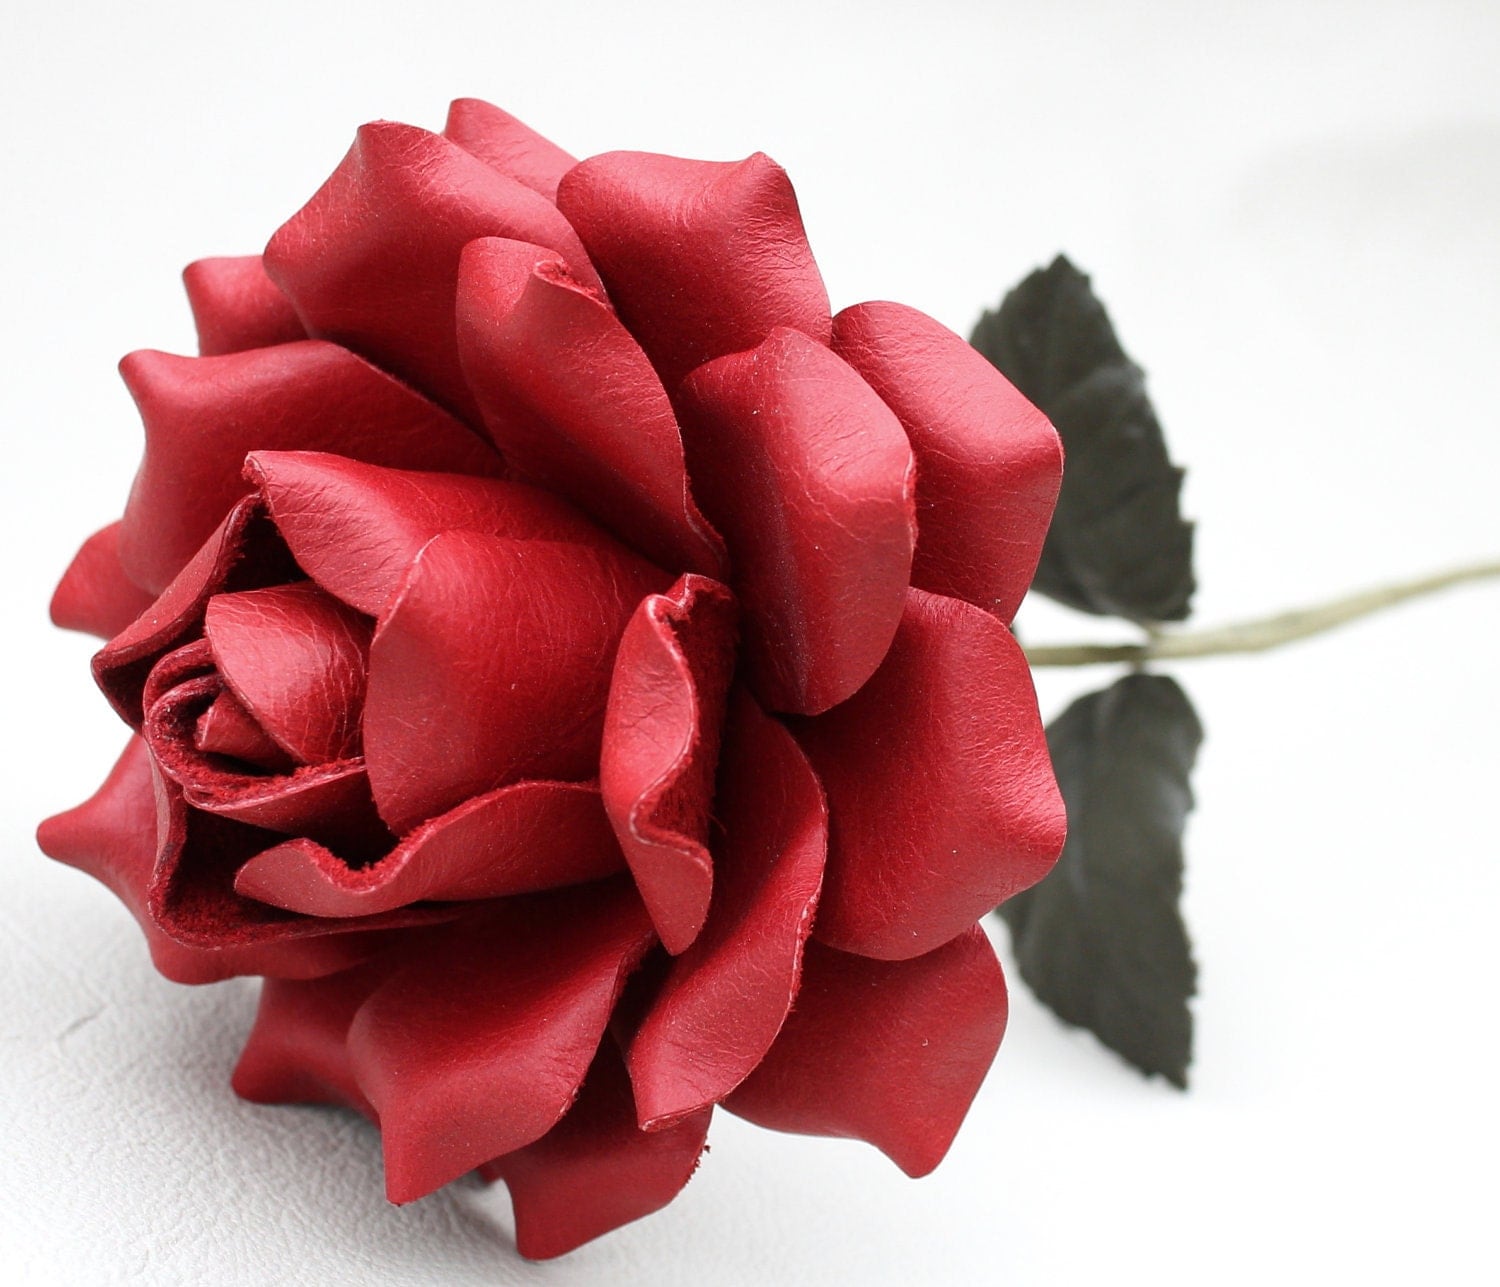 |
| Red Leather Rose |
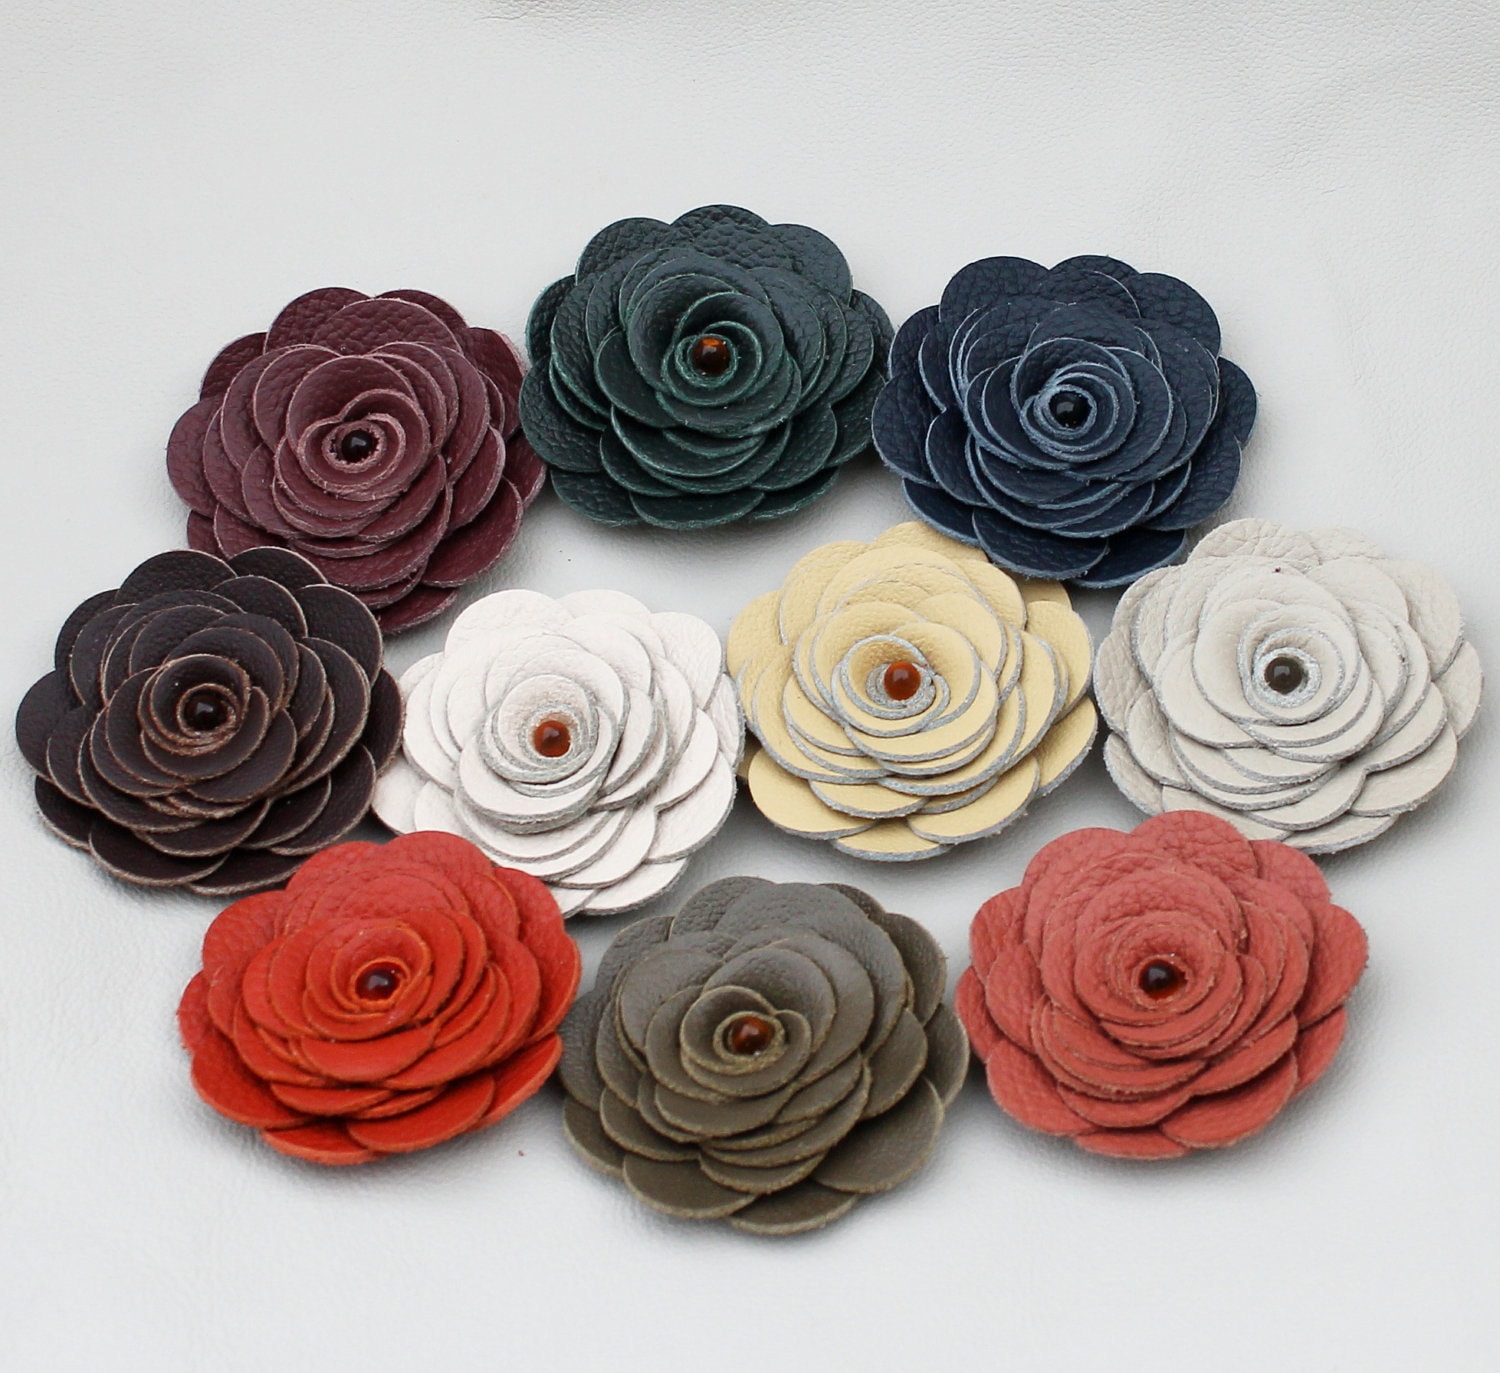
I originally ran across Leather Blossoms on Etsy almost two years ago, admired the leather flowers on headbands, wished I had somewhere to wear the beautiful creations, and filed the shop in the back of my head for a "someday" purchase. Well, fate put the shop in front of me again recently, and I absolutely love all the new styles! There's no question that anyone can find something in this shop to wear for daily use or a special occasion.
I warn you now, I couldn't choose just a few items, so be prepared for a leather photo extravaganza! (Sidebar: everything you see here comes in multiple colors, and I admit you are only being exposed to my color biases. Check out her shop to find something to match your favorite outfit! You can click the link under each photo to go directly to that item's shop page.)
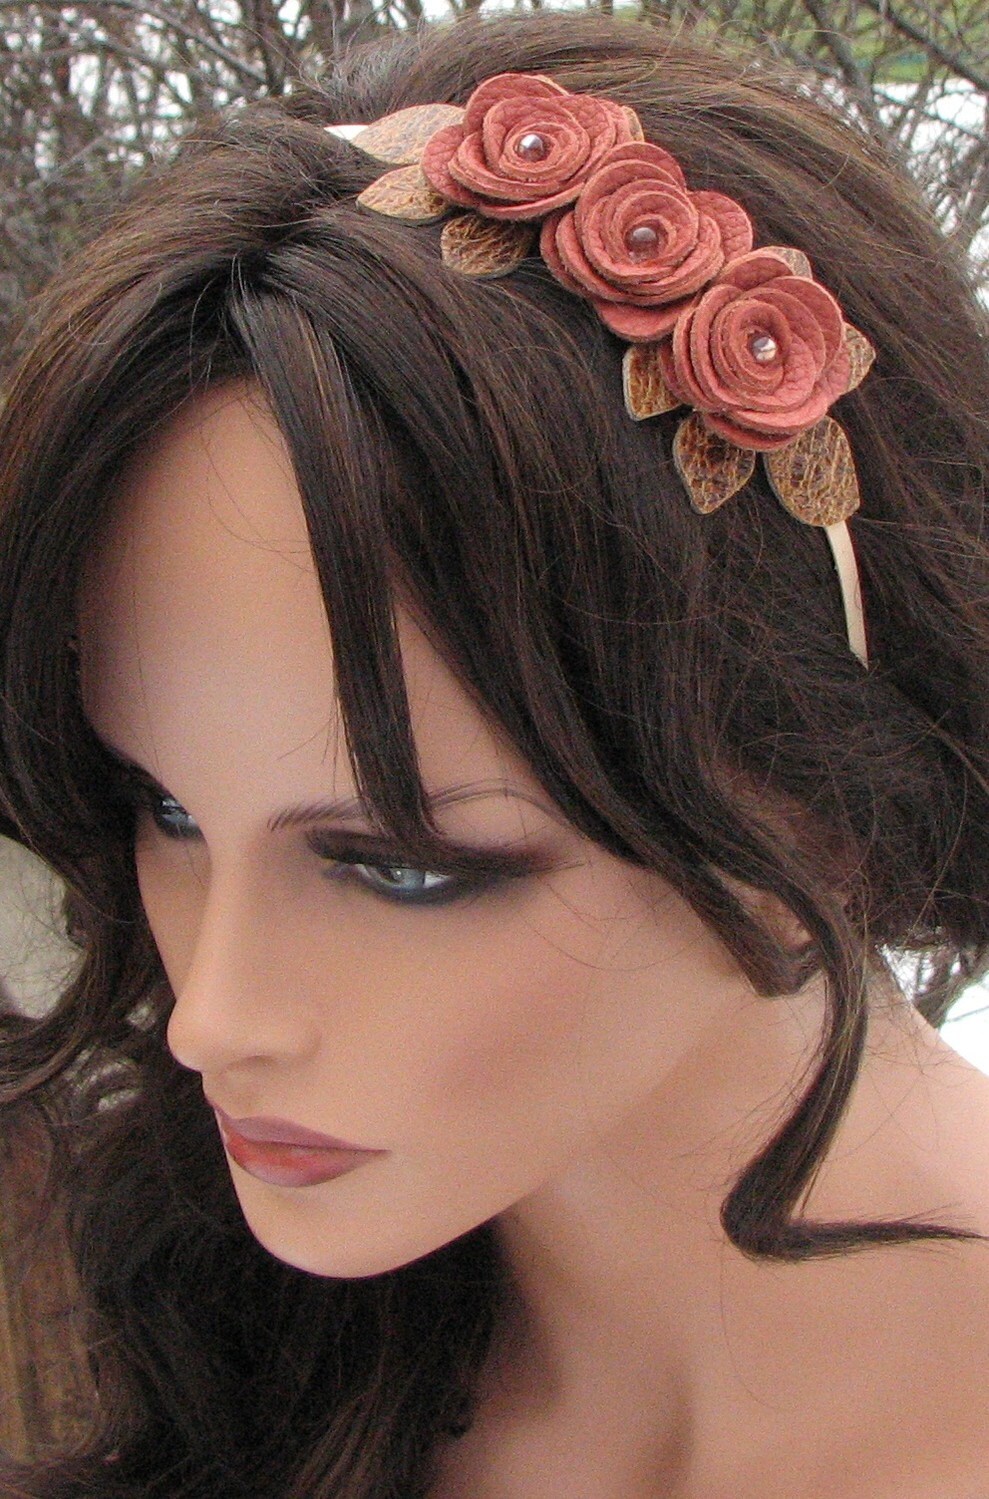 |
| Small Pink Flower Headband |
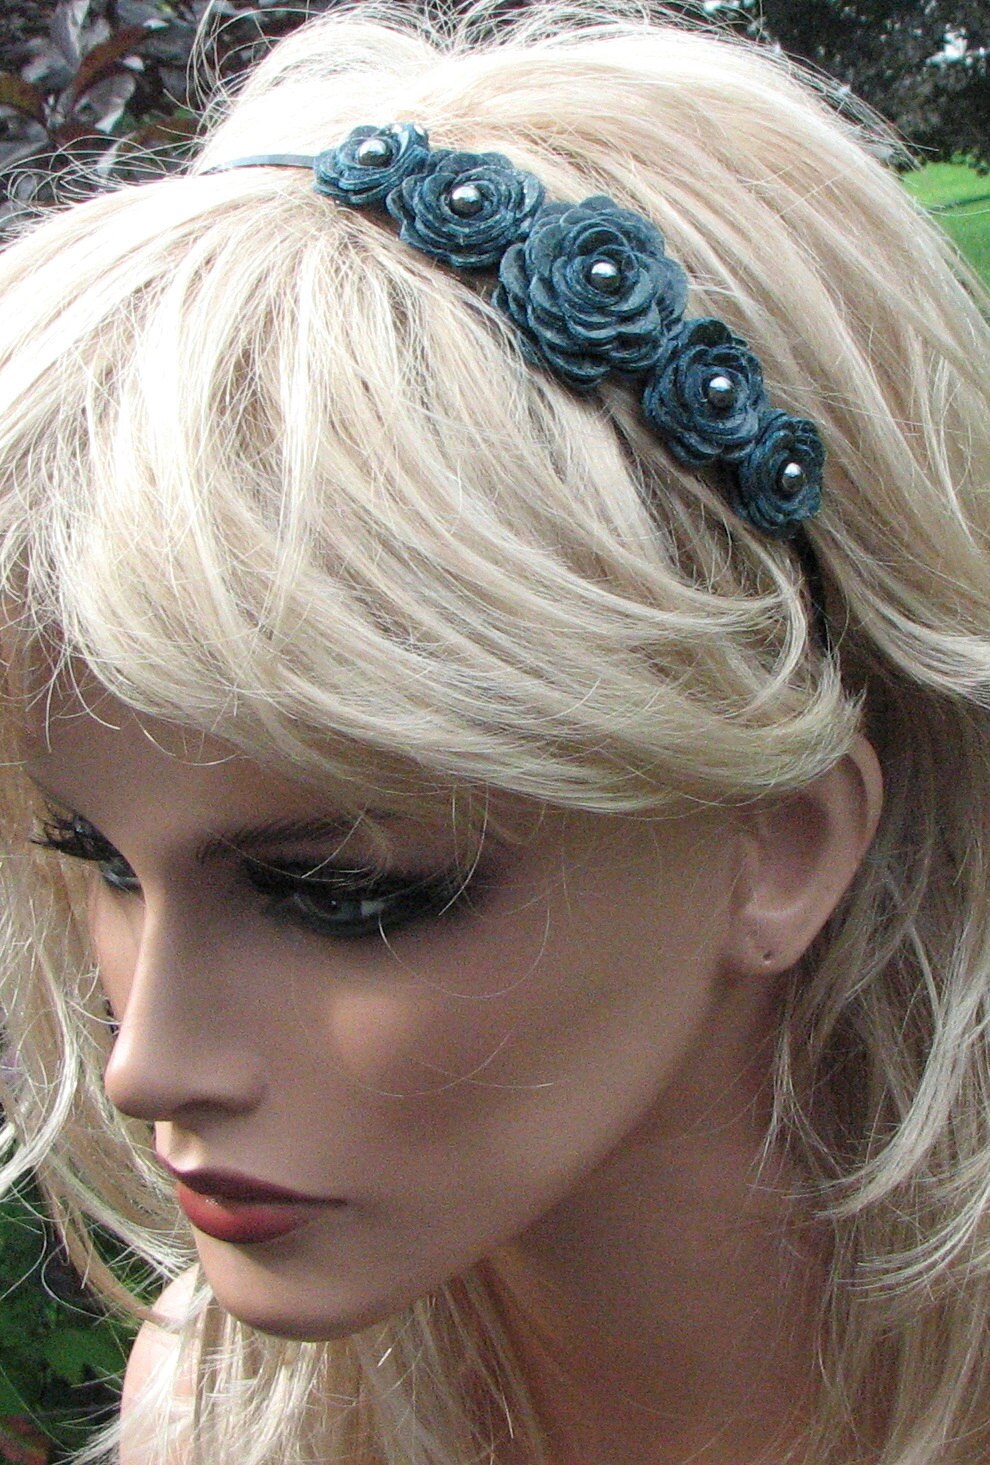 |
| Small Teal Flower Headband |
I think these headbands are perfect for casual wear. They have a clean, fun look without grabbing all the attention. I also appreciate that many of the the photos are taken with both a blond and a brunette mannequin, because what looks good on a blond may NOT be what looks good on me!
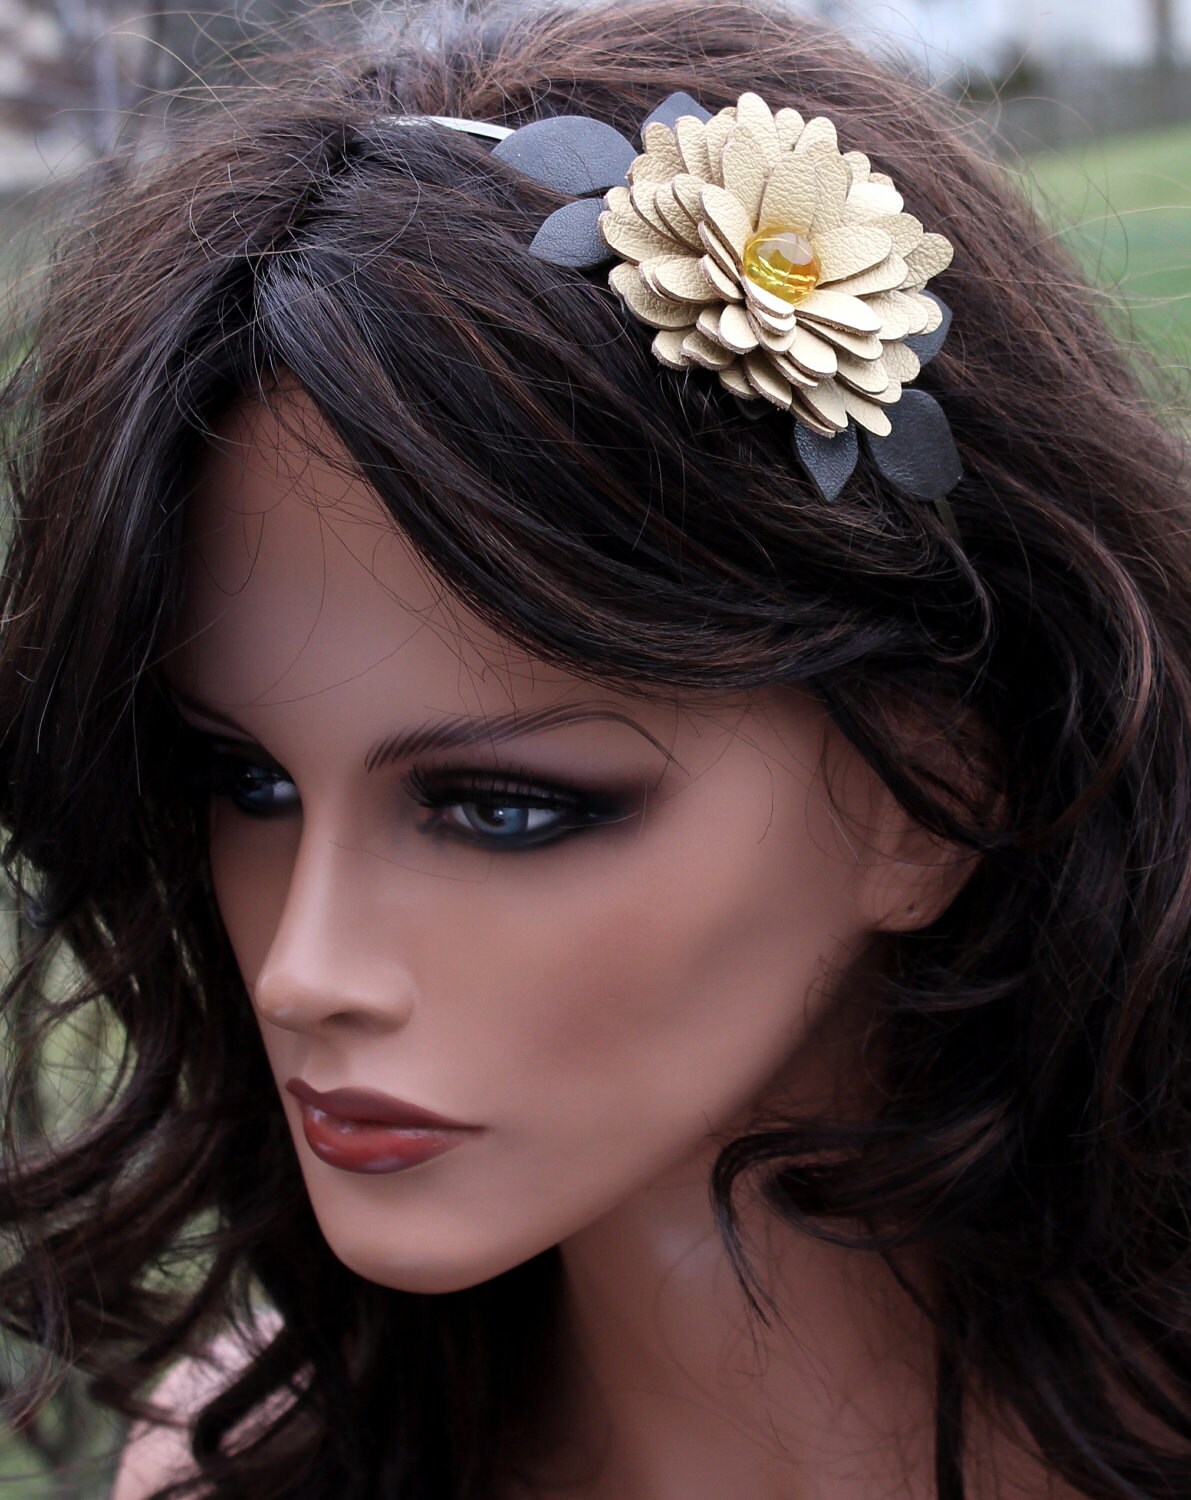 |
| Large Yellow Flower Headband |
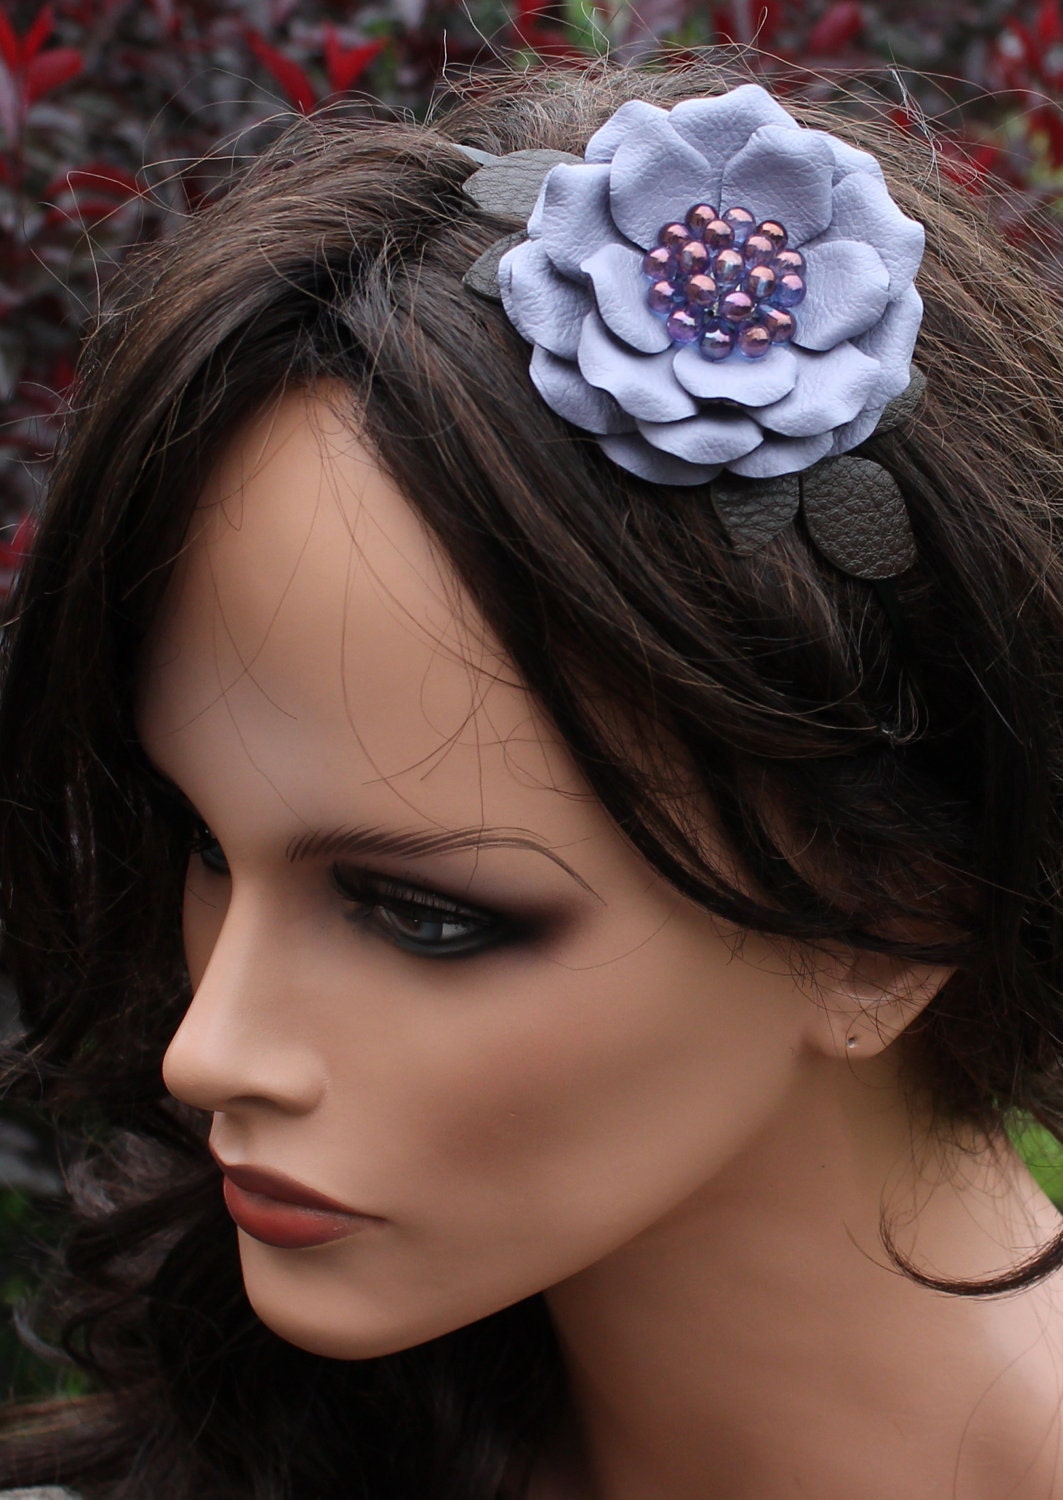 |
| Large Periwinkle Flower Headba |
I also think that any of these headbands would be perfect for bridesmaids, or even the bride. After all, who has bridesmaids who all have the same length hair to create the same up-do? This way, it doesn't matter what hair style they wear!
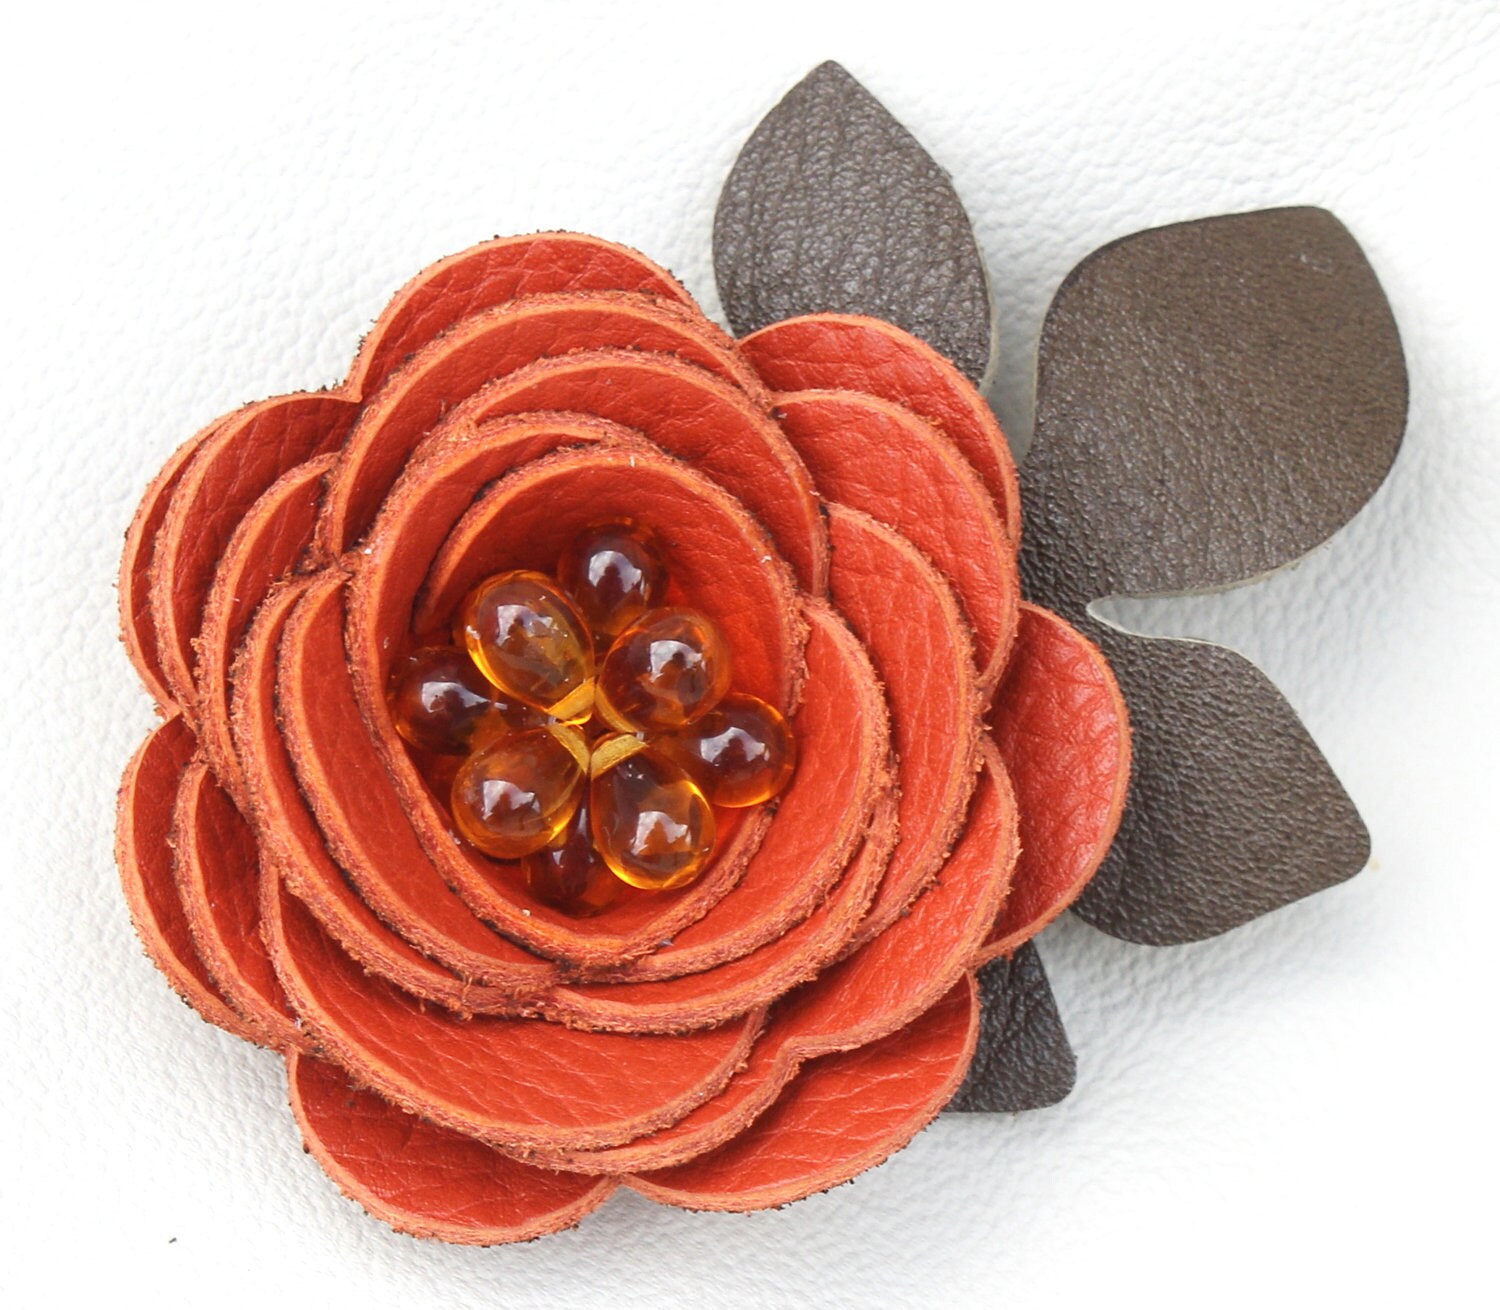 |
| Leather Orange Flower on Alligator Clip |
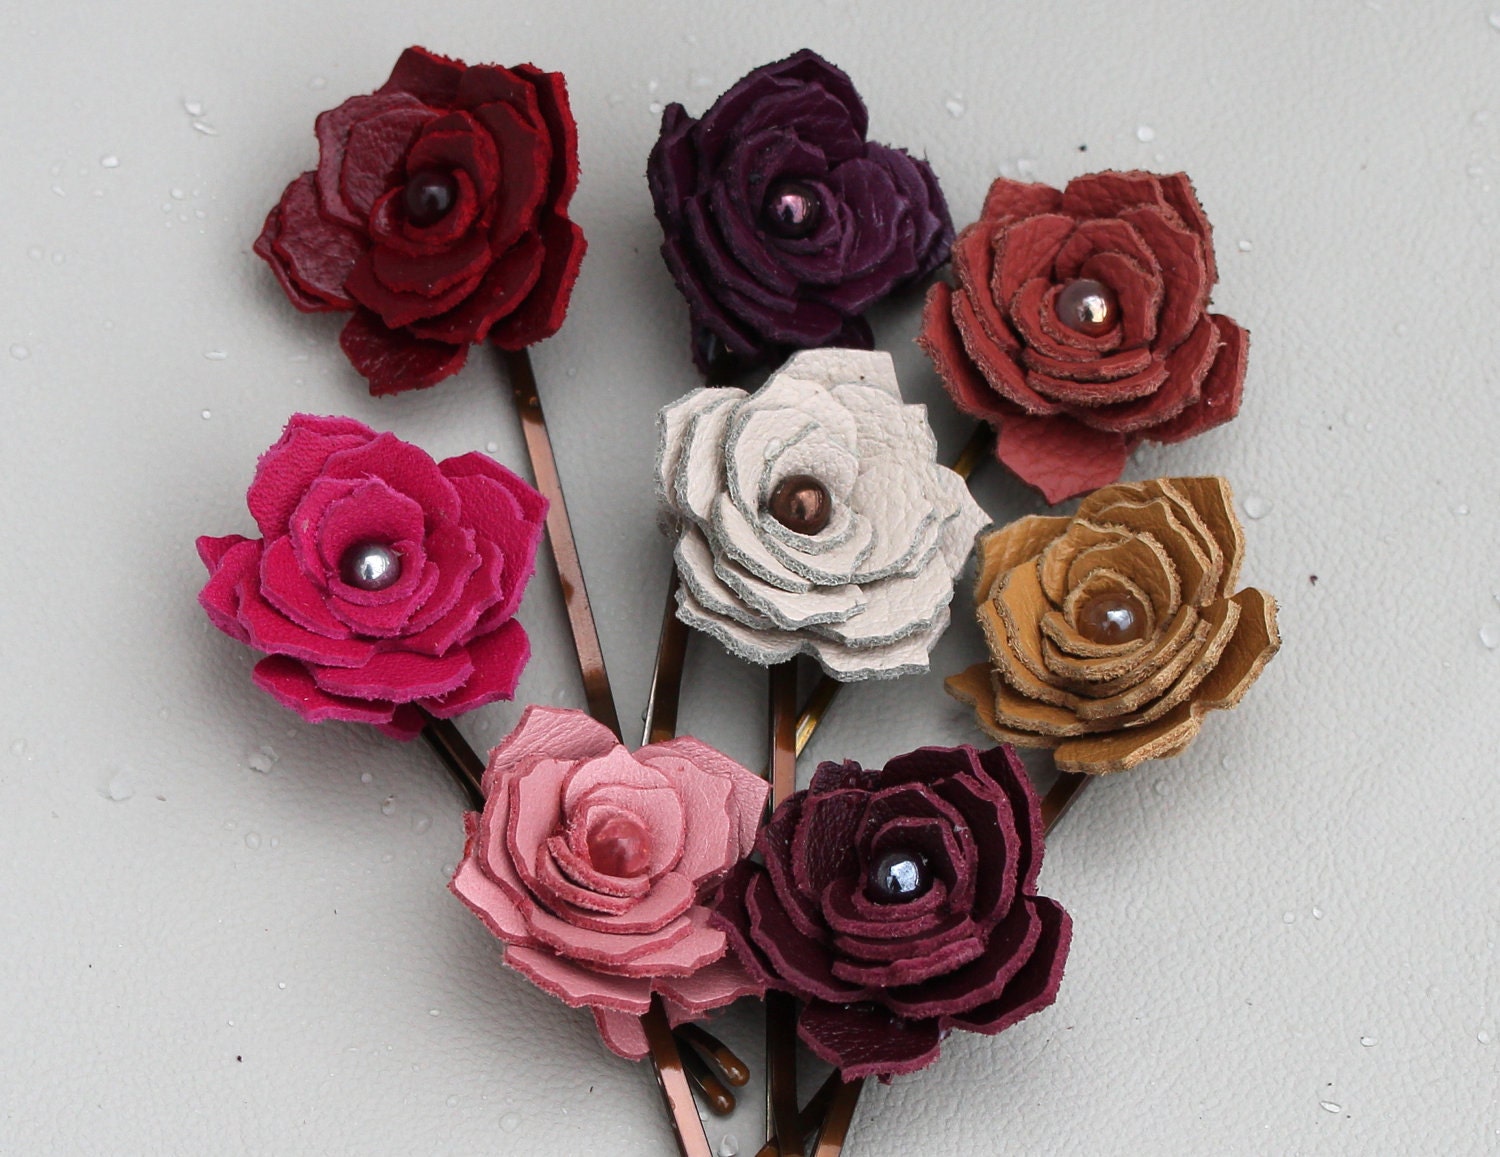 | |||
| Leather Poinsettia Bobby Pins |
 | ||
| Leather Flower Ponytail Holder |
I've focused on hair accessories today, but you should know that Julia has also made many of these flowers into pins (for your jacket, etc.) and jewelry. She also has leather purses and clutches and other leather accessories, in addition to a sale section of the store! If you're the kind of person who's always on the cutting edge of what's new in fashion, or if you just like to wear things that not everybody is, you must check out Leather Blossoms!
PS: If you're more of an "I could do that!" type of person, Julia has a second shop, Blossoms DIY, which offers unattached flowers and leather die cuts.
Wednesday, May 30, 2012
Wine Charm Display How To
The summer craft show season is nearly upon us, and I've been thinking of ways to better display my wine charms, particularly the alphabet charms. I've them in cute little bowls (a hassle to find letters when they're all bunched together), I've separated them a plastic container so they're easy to find (but not as attractive as I'd like and people don't seem to like having to bend over to look at them all), so now I'm trying an upright display.
I couldn't find any pre-made, so I decided to make my own. I did a few searches online for jewelry displays and decided to try something with cork board. Although all the how to's were very nice, they didn't meet all of my criteria for an outdoor show. First, I wasn't hanging this on a wall, so it so it had to be sturdy enough to stand up by itself. I also wanted some kind of frame. Second, using cute tacks or hooks weren't going to do me any good if a gust of wind came up and blew everything down. Whatever I hung on the board had to be secure and stay on the board.
I did some recon at Michael's during a recent 40% off sale and found most of what I needed. I supplemented the essentials with a quick stop at my local quilt shop and Ace Hardware store.
All told, and without looking at my receipts, I'd say I spend about $25. I probably could have found a frame at thrift shop or something, but it wasn't convenient to where I was.
What do you think?
I couldn't find any pre-made, so I decided to make my own. I did a few searches online for jewelry displays and decided to try something with cork board. Although all the how to's were very nice, they didn't meet all of my criteria for an outdoor show. First, I wasn't hanging this on a wall, so it so it had to be sturdy enough to stand up by itself. I also wanted some kind of frame. Second, using cute tacks or hooks weren't going to do me any good if a gust of wind came up and blew everything down. Whatever I hung on the board had to be secure and stay on the board.
I did some recon at Michael's during a recent 40% off sale and found most of what I needed. I supplemented the essentials with a quick stop at my local quilt shop and Ace Hardware store.
- 11x14 piece of cork board - Michael's
- 11x14 simple frame - Michael's
- 1 square yard of white cotton (I didn't need it all, but I wanted enough in case I messed up) - Quilt Shop
- 3 pkgs of 5/8 eye screws - Ace
- Stapler that opens
- Ruler or other measuring tool
- Iron
- Step 1 - Remove the glass from the picture frame and set aside. I'll have to come up with something to do with it later.
- Step 2 - Cut 2 pieces of approximately 14x17 fabric. I felt that one piece was too thin, but two pieces covered the cork board nicely and looked whiter.
- Step 3 - Iron the fabric. Irons make me nervous. I avoid them if I can, but in this case, ironed fabric just looks nicer.
- Step 4 - Lay out the fabric with the cork board on top. I tried two different methods of stapling (I'll explain why later). You can see in the pictures for one try, I cut out most of the corner and folded, and for the second take, I used less fabric and folded the corner in, then stapled. Either worked well. My staples are probably 1" to 1.5" apart. I just estimated what felt best for keeping the fabric taut.
- Step 5 - Fit the board into the frame. Unfortunately, the back won't fit back on. After I've used this once or twice, I might go back and glue it in, but the board isn't loose at all. I would have preferred to use the back to be able to stand up the board, but I ended up using a frame stand instead, and the frame became mostly decoration and a little added weight.
- Using the ruler, decide how far apart the eye screws need to be. I want to hang wine charms on, so I measured out six across and five down. After measuring the first row and the beginning of the second, I used the grain of the fabric as a guide and it worked fine.
- Here's why I had to staple twice: on the first attempt, instead of eye screw, I used double sided tacks, which are basically big staples. It didn't work. Hammering them in was a pain, and then they weren't big enough for the wine charms to clasp. I took off the fabric which now had ugly holes in it, put on fresh fabric, and tried again using eye screws, which worked beautifully, although my thumb was pretty tired by the end.
All told, and without looking at my receipts, I'd say I spend about $25. I probably could have found a frame at thrift shop or something, but it wasn't convenient to where I was.
What do you think?
Subscribe to:
Comments (Atom)


