*I am using an Apple computer. Directions for a PC are probably the same or similar. I am not a Picasa expert, and there may be other ways to do this, but this has worked for me. Despite all the directions, it is very easy.
1. When you first open Picasa, it makes things easier if you have a

general idea of what you want for your background. I created a new album (File>New Album) and called it Ad Photos. I then searched through all my pictures and picked a few that might work as the background for an ad. In a few cases, I made a copy of the photo, modified the color to b&w or sepia, and then dragged the modified photo to my new album.
The picture will remain in it's original location, also.
2. On t
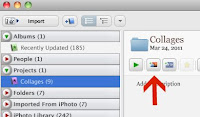 he left hand side is the menu. Mine says Albums, People, Projects, Folders, Imported from iPhoto, etc. Go to Projects>Collages>Create a Photo Collage (Create a Photo Collage should be next to the green arrow).
3. You will automatically be in the Settings tab. Go to
Page Format>Add
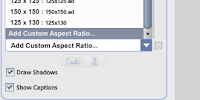 Custom Aspect Ratio. A box will pop up, and you can put in the pixels that you need for your ad. They are usually 150x150 or 250x125 or something to that effect. Most websites will have a page for advertisers that has a list of the different sizes they offer. Type in the size you need. This size will be remembered if you ever need it again. If you
want, though, you can name this the size it is.
4. Now go to the Clips tab. If you have created a collage before, there will be lots of pictures already. If you click on a picture and click Delete, it will go back to your Clips tab.
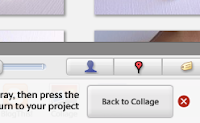
5. In the Clips tab, click Get More. This will take you back to your photo library. At the top of your left hand menu should be the Album you created and put different background pictures in. Choose one of the pictures, then click Back to Collage on the bottom right hand of your screen.
6. The image you chose is now in your Clips tab. Drag it over to the
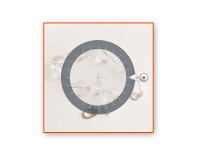
big white space that will soon be your ad. Re-size the photo as needed so that no more white is showing, by pulling the little orange in or out. If you want to have 2 or 4 small pictures in this space, you can do that, too. If you want more then one photo, I recommend going back to your Settings tab. Right under the word Settings should be a pull down tab that starts with Picture Pile. If you scroll down and choose Mosaic or Grid, your photos will automatically re-size to fit the size you have.

7. When your background is appropriately sized, click Create
Collage.

8. If you didn't make any changes to your background, you may do
so here, changing the exposure and color. If you want black & white, look under the Effects tab.
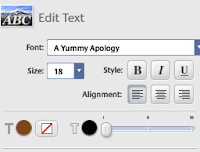
9. Under Basis Fixes>Text, you may add as many word boxes as
you want. You can change the color, size, and font.

10. When you are satisfied with the look of your ad, you will need to export it out of Picasa for it to become a jpg file. At the top of your screen, go to File>Export Picture to Folder and then choose
where
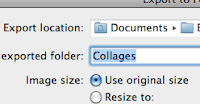 in your computer you want it saved. I have a folder in Documents called Ads I dump everything into. I also name the picture what size it is, i.e. 150x150.
11. I attach the jpg image in an email and send it to whomever I'm sponsoring.
I hope this has been helpful for you. Please let me know if there are better ways to accomplish any of these steps! Here is a photo of one of my finished 250x125 ads:

stopping by from the etsy blog team, love this tutorial. I didnt realize how badly i wanted to know how to do this! thanks!
ReplyDeletetheinspiredlens.blogspot.com Hope to see you there!
You're welcome! You can also change the pixel size to create a banner for Etsy or Zibbet or any other online venue! I did this to create the new banner here on my blog by taking a screen shot of the side of my blog to use as the background so it blends and you can't see the box. :)
ReplyDelete